Home Hardening for Wildfire: The Ember-Defense Checklist That Actually Matters
Embers, not flames
If you picture wildfire as a giant orange wall rolling toward your house, you’ll defend against the wrong thing. The research from the Insurance Institute for Business & Home Safety (IBHS) and decades of post-fire investigation tell a different story: the leading cause of home loss in a wildfire is embers: burning fragments of vegetation and structures that wind carries up to a mile ahead of the actual fire front.
Those embers rain down on neighborhoods like glowing snow. They don’t need to touch a flame to do damage. They just need to find fuel: a clogged gutter, a dry doormat, bark mulch against the siding, a pile of pine needles in a roof valley, and they’ll smolder there until something ignites. Then your house becomes the source of embers for the next house downwind.
IBHS recreates a wind-driven ember storm against a full-scale house. Source: Insurance Institute for Business & Home Safety.
This is good news, because embers are something you can actually plan for. You can’t stop a fire from coming, but you can systematically remove every easy place an ember could land and catch. That, in a sentence, is home hardening. Everything below is organized around that one idea, in roughly the priority order recommended by IBHS’s Wildfire Prepared Home program, Firewise USA, and Cal Fire.
One caveat before the list: nothing here makes a home immune to fire. No home is. The goal is a fire-resistant home that is far less likely to ignite, one that buys you and the firefighters better odds.
Zone 0: the first 5 feet is the most important real estate you own
Zone 0 is the noncombustible immediate zone: the band of ground and structure within 5 feet of your house. It is the single highest-priority area, because anything that ignites here is touching or nearly touching the building.
The rule for Zone 0 is simple and strict: nothing that burns. Practically, that means:
- No bark mulch, no wood chips against the foundation. Swap to gravel, decomposed granite, or bare mineral soil. Bark mulch is one of the most reliable ways to walk an ember straight into your siding.
- No shrubs, no plants directly against the wall, especially evergreens like juniper, which are loaded with flammable oils.
- Move firewood stacks, propane tanks, door mats, patio furniture cushions, and trash/recycling bins out of this zone, particularly during fire season.
- Clear dead leaves and needles that collect in the corner where the ground meets the wall, behind downspouts, and under the deck.
If you do nothing else this weekend, clear Zone 0. It’s free, it’s fast, and it removes the embers’ easiest path into your home.
The roofline: your roof and gutters are where embers concentrate
After Zone 0, the roofline is where I spend most of my attention, and it’s the area I know best from two-plus years of doing in-home exterior assessments as a gutter and water-management consultant. Two things matter here: what your roof is made of, and what’s sitting on and in it.
The roof covering itself. Your first line of defense is a Class-A fire-rated roof: asphalt composition shingles, metal, clay or concrete tile, and most modern materials qualify. If you have an old wood-shake roof in a fire-prone area, replacing it is one of the highest-impact upgrades you can make. While you’re at it, the gaps at the edges and ridges matter: embers love to wedge under tiles or into the open ends of barrel tile. “Bird-stopping” those gaps with noncombustible material closes another door.
The debris is what most people overlook. A Class-A roof does you a lot less good when there’s a windrow of dry pine needles baking in the valley and a gutter packed with leaf litter running the entire perimeter of the house. That debris is concentrated fuel sitting at the exact height embers collect. Wind drives embers up and over the roof, and they settle right where the airflow slows: the valleys, the roof-to-wall corners, and the gutters along the eaves.
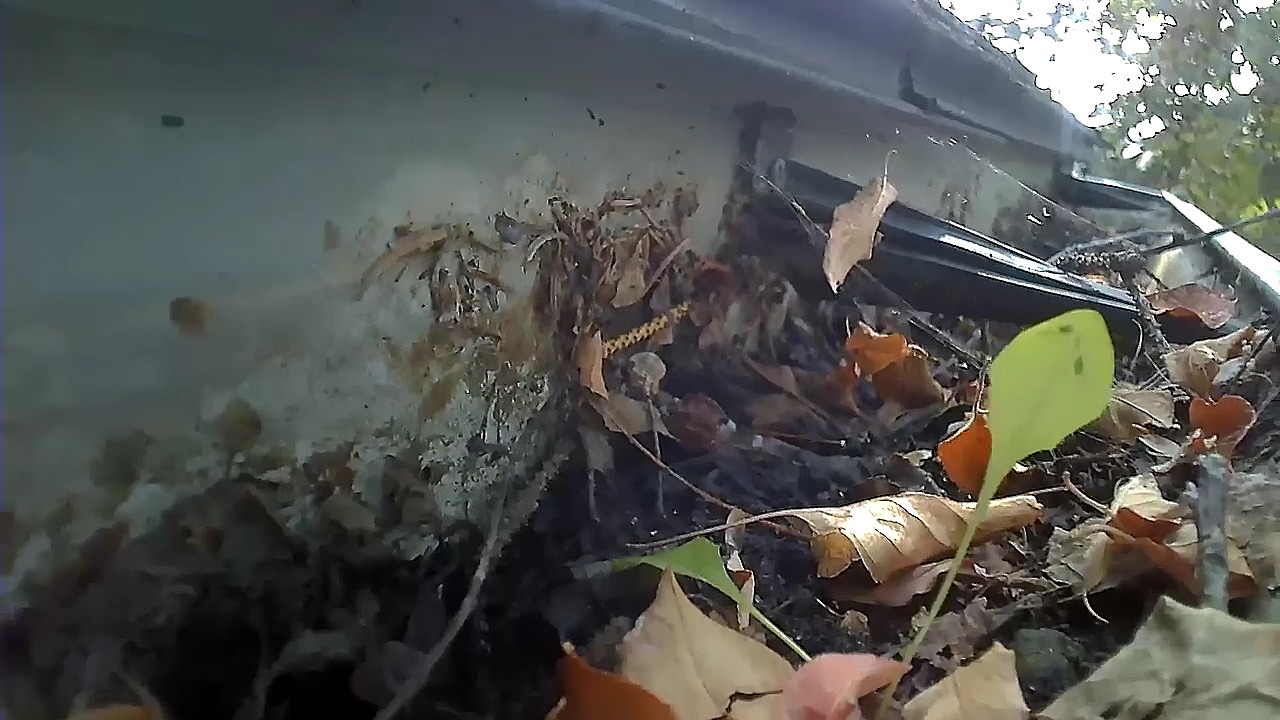
Gutters specifically are an ember magnet, and it’s worth understanding why. A loaded gutter is a long, continuous trough of dry, fine, airborne-ready fuel running directly beneath the edge of your roof and right up against the fascia and roof sheathing. An ember landing there has everything it needs: fuel, oxygen, and a structural surface to ignite. I’ve cleaned out gutters in late summer that were essentially kindling baskets bolted to the most vulnerable seam of the house.
The fix is to keep the roofline and gutters clear of ignitable debris. You can do that by climbing up and cleaning by hand several times a year, which most people don’t keep up with, especially right when it matters most, at the dry end of summer. Or you can install a gutter-protection system that keeps leaves and needles out so they never accumulate in the first place. A self-cleaning, debris-shedding system like LeafFilter is what I most often recommend and what we refer and book through, because it removes the fuel from the gutter line and removes the “I’ll get to it” problem. Less debris at the roofline means less fuel where embers concentrate.
There’s a bonus, and it’s the other half of my job: working gutters also move roof water away from your foundation. A clogged, overflowing gutter dumps water right at the base of the wall, the same Zone 0 you just hardened, causing rot, foundation issues, and chronic moisture damage long after fire season ends. So a debris-free gutter system pays off twice: less fuel at the roofline, and proper water management year-round. Many of these same upgrades can also help on the insurance side; see our companion guide on wildfire home insurance for how roofline improvements factor into coverage and mitigation credits.
Ember-resistant vents: the holes in your armor
Your attic and crawlspace breathe through vents, and those vents are open doorways for embers. A glowing ember sucked into an attic full of dry stored boxes and exposed wood framing can ignite a house from the inside while the outside still looks fine. Vent intrusion is one of the most common ways homes are lost.
The standard guidance from NFPA and Firewise:
- Cover all vents with 1/8-inch noncombustible metal mesh. The common 1/4-inch screen lets embers through, and fiberglass or plastic mesh simply melts.
- Better still, install listed ember-resistant vents designed and tested to block embers and flame.
- Don’t forget the easy-to-miss ones: gable vents, soffit/eave vents, foundation and crawlspace vents, and dryer vents.
This is a relatively cheap upgrade with an outsized payoff.
Siding, decks, fences, and windows
Siding. Noncombustible or fire-resistant siding (stucco, fiber-cement, or masonry) outperforms wood and vinyl, which can melt or ignite. The most vulnerable spot is the bottom 6 inches where siding meets the ground; keep that clearance noncombustible.
Decks and under-deck. A deck is a horizontal surface that catches falling embers, and the space underneath is a classic trap for dry leaves. Keep the area under and on top of the deck clear of debris, store nothing flammable below it, and consider ember-resistant or noncombustible decking when you replace boards.
Fences as a fuse. A wood fence attached to your house is a literal fuse leading flame straight to the wall. If it catches at the far end, it can carry fire right to the structure. The fix is to put a noncombustible section (metal or masonry) in the last 5 feet where the fence meets the house, so there’s a break in the fuel.
Windows. Heat from nearby burning vegetation can crack single-pane glass and let fire inside before an ember ever lands. Dual-pane windows with at least one pane of tempered glass resist that radiant heat far better. It’s a bigger-ticket item, so it usually sits lower on the priority list than debris removal and venting, but it matters in higher-exposure homes.
Defensible space: zones 0 to 5, 5 to 30, and 30 to 100 feet
Hardening the structure and managing the landscape around it work together. Cal Fire and Firewise USA describe defensible space in zones radiating out from the house:
- Zone 0 (0 to 5 ft), Immediate / noncombustible. Covered above. Nothing that burns. Highest priority.
- Zone 1 (5 to 30 ft), Lean, clean, and green. Remove dead plants, grass, and weeds. Keep grass mowed and irrigated. Space out trees and shrubs so fire can’t climb or jump from one to the next. Keep tree limbs at least 10 feet from the roof and chimney, and prune up “ladder fuels” that let a ground fire climb into the canopy.
- Zone 2 (30 to 100 ft), Reduce fuel. Cut grass low, create both horizontal and vertical spacing between vegetation, and remove accumulated dead material. The goal here isn’t a moonscape; it’s slowing the fire and dropping its intensity before it reaches the house.
Defensible space gives firefighters room to work and reduces the heat and ember load hitting your hardened structure. The structure and the landscape are a system; neither alone is enough.
Start here: a prioritized checklist
Do these roughly in order. The early items are cheap and high-impact; knock them out first.
- Clear Zone 0 (0 to 5 ft). Remove mulch, dead leaves, firewood, and flammable items from against the house. Free, today.
- Clean the roof, valleys, and gutters of all needles and leaf litter. Free if you do it yourself; the catch is keeping up with it.
- Solve the gutter problem permanently. Install a debris-shedding gutter-protection system like LeafFilter so the fuel doesn’t come back, and your foundation stays dry. We refer and book through LeafFilter.
- Screen every vent with 1/8-inch metal mesh or upgrade to listed ember-resistant vents. Cheap, fast, high payoff.
- Clear under the deck and remove anything flammable stored beneath it.
- Put a noncombustible break in the last 5 feet of any wood fence attached to the house.
- Move into the landscape: create defensible space in Zones 1 and 2 (spacing, pruning, dead-fuel removal).
- Plan the bigger upgrades as budget allows: Class-A roof if you still have wood shake, fire-resistant siding, dual-pane/tempered windows.
Document everything you do: photos and receipts. Many of these steps can also qualify you for insurance mitigation discounts and may be required to keep coverage in high-risk areas; our wildfire home insurance guide covers how to turn this work into premium savings and how to talk to your carrier.
For more on specific products and how the pieces fit together, browse the Embers & Eaves homepage; we’re building out deeper guides on vents, decking materials, roof upgrades, and region-by-region requirements.
FAQ
Do gutter guards help in a fire zone? Indirectly, yes, and meaningfully. Gutter guards don’t put out fires, but a good debris-shedding system keeps dry leaves and needles from accumulating in your gutters, which removes a concentrated band of fuel sitting right at the roofline where wind-blown embers collect. Less fuel where embers land means fewer ignition points on the most vulnerable seam of your house. The bonus is year-round water management: clear gutters also move roof water away from your foundation. Pair it with a Class-A roof and clean roof valleys for the full effect.
What’s the single most important home-hardening step? Clearing the noncombustible immediate zone, the first 5 feet around your house (Zone 0), and keeping your roof and gutters free of ignitable debris. These cost little to nothing and address where most homes actually ignite: embers landing in dry material on or right against the structure.
Can I harden my home myself? Much of it, yes. Clearing Zone 0, cleaning gutters and roof valleys, screening vents with 1/8-inch metal mesh, and creating defensible space are all DIY-friendly. Bigger upgrades are worth hiring out for both safety and quality: re-roofing, a permanent gutter-protection system, replacing siding or windows, and anything involving heights or structural work. A good rule: do the free fuel-removal work yourself this season, and schedule the permanent upgrades over time.
Is any of this required by my insurer? Increasingly, yes. In high-risk states, carriers may require defensible space, a fire-rated roof, screened vents, or a clear Zone 0 to issue or renew a policy, and many offer mitigation credits for the same work. See our wildfire home insurance guide for specifics.
Does hardening guarantee my home survives a wildfire? No, and be wary of anyone who promises it does. No home is immune to wildfire. What hardening does is stack the odds heavily in your favor by removing the easy ignition points, so your home is far less likely to be the one that catches. Combined with defensible space and community-wide effort through programs like Firewise USA, it’s the most effective thing a homeowner can do. For authoritative guidance, see IBHS’s Wildfire Prepared Home, NFPA’s Firewise USA, Cal Fire, and Ready.gov.
Related guides
Class A Roofing Shingles: The Fire-Rated Choice for Asphalt Roofs
Class A asphalt shingles carry the highest fire rating for roofing in the US and are the baseline for any wildfire-resilient roof in a fire-prone state.
Read the guide →What Is a Class 4 Roof? Impact Resistance and Insurance Savings
A Class 4 impact-resistant roof can earn meaningful insurance discounts and adds roofline durability, but it is not the same as a fire rating. Here is what to know.
Read the guide →Class A Roof Assembly: How the Whole System Earns Its Rating
A Class A fire rating applies to the whole roof assembly, not just the shingles, and understanding the difference changes how you approach re-roofing in fire country.
Read the guide →Keep ignitable debris out of your roofline
Get a free, no-obligation LeafFilter gutter-protection assessment. Fine micro-mesh keeps leaves and pine needles out of the gutters, the spot where wind-blown embers love to land. Booking through us supports this site.
Get a free LeafFilter assessment →