Wildfire Preparedness Checklist for Homeowners
Most wildfire preparedness guides are either too vague to act on (“create defensible space!”) or too long to finish before fire season. This one tries to be a working checklist. The four sections below correspond to the four main risk areas, and within each I’ve tried to give you the specific thing to do rather than a category to think about. You don’t have to tackle all of it at once. You do have to start before fire season peaks, not during it.
Zone 0 and defensible space: working outward from the house
The California Department of Forestry and Fire Protection (Cal Fire) divides defensible space into three zones, defined by distance from the structure. NFPA’s Firewise USA program uses a similar framework, and it’s the right way to think about the problem because the risks in each zone are genuinely different.
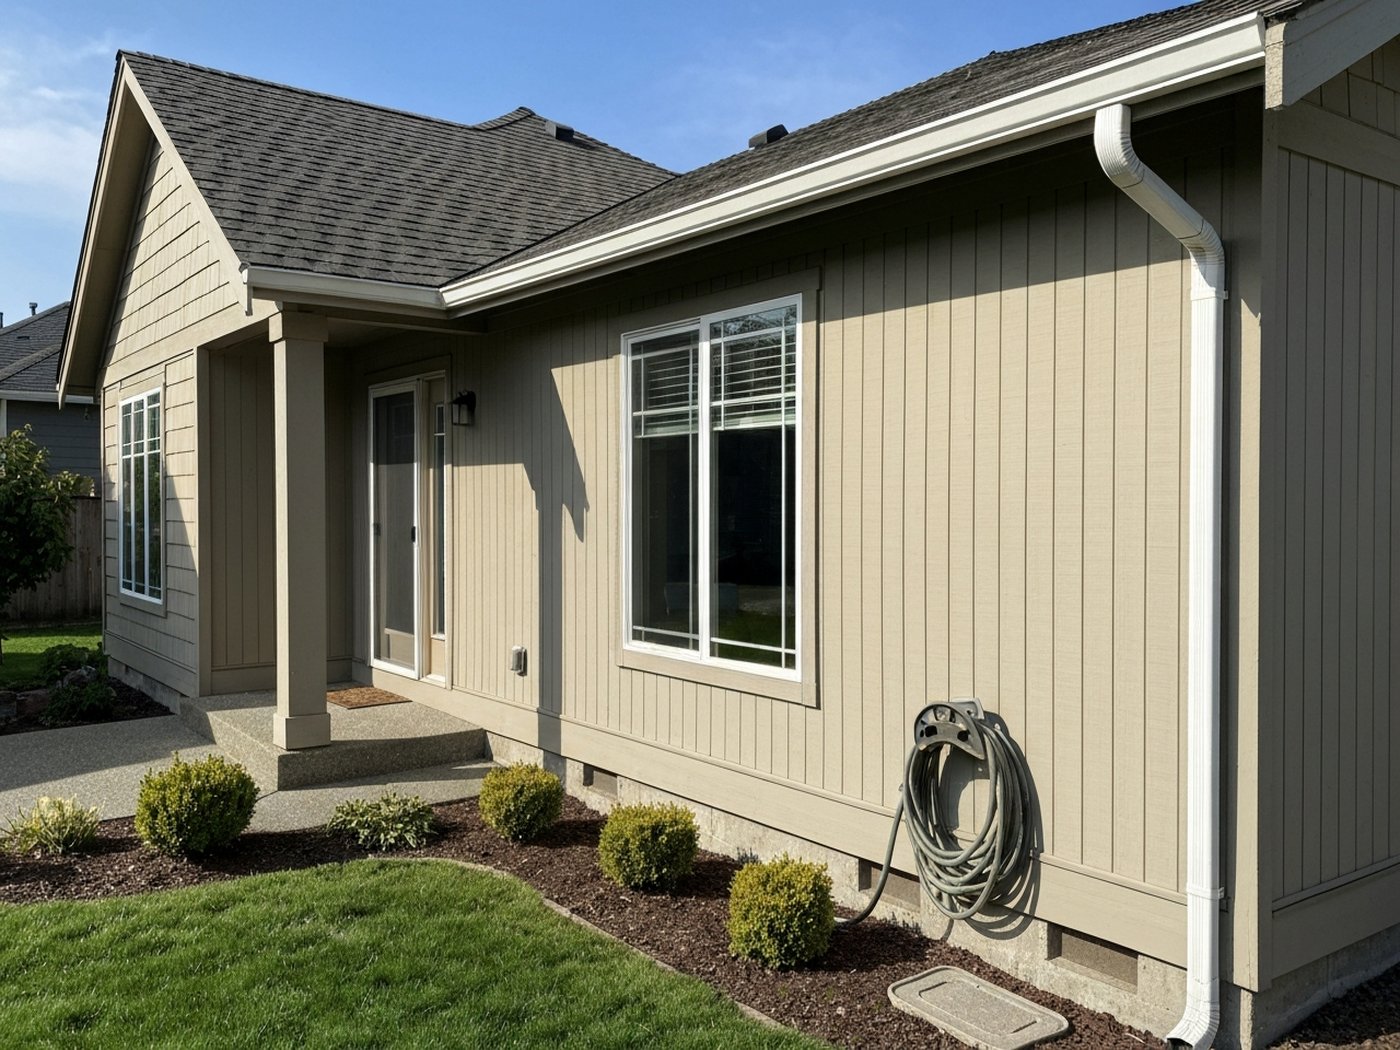
Zone 0 (the first 5 feet). Cal Fire and IBHS research both point to this as the most critical zone. Embers land and sit in whatever is immediately against your foundation and siding. Remove all dead plants, dry pine needles and leaves, and bark mulch within 5 feet of the structure. Replace organic mulch with gravel, decomposed granite, or another noncombustible ground cover. Move firewood at least 10 feet from the house. Keep this zone as clean and hard-surfaced as you can sustain.

Wood chip or bark mulch right against the foundation is one of the most common Zone 0 mistakes. It looks tidy in the spring and is dry kindling by August. Swap it for gravel or decomposed granite.
Zone 1 (5 to 30 feet). The goal here is to reduce fire intensity and prevent flames from reaching the house. Mow and water grass when possible. Remove dead vegetation and prune tree branches up from the ground to eliminate ladder fuels: those low branches that let a surface fire climb into the canopy. Space large shrubs so there is no continuous fuel pathway running toward the structure. Individual plants or clusters are fine; a solid, unbroken carpet of vegetation running to the foundation is not.
Zone 2 (30 to 100 feet, or to your property line). This zone is about reducing fire intensity and slowing a fire’s rate of spread before it reaches Zone 1. Prune trees to open the canopy. Remove standing dead trees. Mow or thin ground cover. Local fire agencies and forestry departments, including the Colorado State Forest Service, the Oregon Department of Forestry, and your county fire safe council, often publish plant-specific zone guides and offer free or subsidized defensible-space inspections. It’s worth checking what’s available in your area.
The roofline: where embers do their worst work
Most homes in a wildfire don’t burn because a wall of flame reaches them. IBHS documents the same pattern year after year: embers, blown ahead of the fire by wind, land on and in the house. The roofline is the highest-risk landing zone.
Roof covering. A Class A fire rating is the standard to reach for. Modern asphalt architectural shingles, concrete and clay tile, standing-seam metal, and most composition materials meet it. Wood shake roofs do not. If you have an older wood shake or low-rated composition roof, this belongs on a renovation priority list.
Vents. Soffit vents, gable vents, and roof vents are openings embers can fly through. Cal Fire and Firewise USA both call unprotected vents a common ignition point. The fix is 1/16-inch corrosion-resistant mesh screens or purpose-built ember-resistant vent covers rated to International WUI Code requirements. If your home has open eave vents with no screen, that is an inexpensive retrofit with a meaningful impact.
Gutters and the roofline seam. This is where I spend most of my professional time. In two-plus years doing exterior assessments as a gutter and water-management consultant, I’ve pulled what amounts to kindling out of late-summer gutters on home after home. A gutter packed with dry pine needles and leaf litter is a long trough of ember-ready fuel running the perimeter of your roof, sitting right at the seam where the roof deck, fascia, and eave meet. An ember drops in, finds dry material, and has everything it needs.
Clean them twice a year at minimum: late spring after trees drop pollen and seeds, and fall after leaf drop. If you have conifers close to the house that shed year-round, plan a third pass in late summer. And clean them before August, not during fire season when conditions are worst and you least want to be on a ladder. If you want to remove the chore entirely, a fine stainless-steel micro-mesh gutter guard keeps debris out without adding combustible material. For where gutters fit in the full home-hardening picture, the wildfire home hardening guide covers all of it.

Put gutter cleaning on the calendar for late May or early June, before fire season peaks. Waiting until smoke is in the air means you're on a ladder in the worst possible conditions.
Walls, windows, and decks
Siding. Fiber cement (HardiePlank and similar products), stucco, and metal siding all offer better resistance than wood. If you have wood siding, the near-term step is keeping Zone 0 clear of fuel against it and keeping the siding itself well-maintained, with no peeling paint and no gaps where embers can slip behind panels. IBHS “Wildfire Prepared Home” evaluations assess siding condition as part of the overall home rating.
Windows. Single-pane windows can crack and fail under radiant heat from a fire burning nearby, opening a path for embers and flame. Double-pane tempered glass holds up better, and it’s the standard in newer wildfire-zone construction. If a full replacement is not practical, make sure window screens are intact.
Decks. A combustible wood deck attached to the house is a direct ignition pathway. IBHS research has shown that embers collect in the gaps between deck boards and accumulate under the deck structure. Composite decking materials eliminate that fuel. If you have a wood deck you’re not replacing, clear the area underneath it of any stored combustibles and keep the board surfaces swept clean during fire season. Move propane tanks, wood piles, and patio furniture away from the house before conditions elevate; these are ignition sources that can be moved.
Your go-bag and evacuation plan
No amount of home hardening changes the fact that you may need to leave, possibly with very little warning. Ready.gov recommends a 72-hour kit you can grab fast: water (1 gallon per person per day), three days of food, prescription medications, phone chargers, copies of critical documents (passport, insurance declarations page, deed), and cash in small bills. Store copies of those documents in a cloud account as well, not only in the physical kit.
Know your community’s evacuation notification system before you need it. Many counties use a three-level framework: evacuation warning (be ready to leave), evacuation order (leave now), and all-clear. Systems vary by state and county. Sign up for your local emergency alerts through your county Office of Emergency Services or equivalent. Some areas push Wireless Emergency Alerts automatically; others require active registration. Understanding what an alert means before you receive one is what lets you move quickly.
Designate a meeting point and an out-of-area contact that everyone in the household can reach. When a warning is issued, pre-load your car: pets and carriers, medications, go-bag. Don’t wait for the order. If you have horses or livestock, your evacuation route and trailer logistics are a separate plan that takes considerably more lead time to arrange. See the guide to wildfire evacuation levels for how the notification system works in practice.
Insurance: know your numbers before fire season
Coverage for wildfire is generally included in a standard HO-3 homeowners policy. The problems homeowners actually face are adequacy and availability: does your coverage limit cover what it would cost to rebuild today, and can you still get covered in a high-risk area.
Rebuilding after a major wildfire in a community where many homes burned is almost always more expensive than normal conditions. Materials and labor are scarce. If your dwelling limit was set years ago, the gap between that number and today’s rebuild cost can be significant. Ask your insurer about extended replacement cost endorsements (which pay a stated percentage above your limit, commonly 25 to 50 percent depending on the policy) or guaranteed replacement cost coverage where available.
Keep a current home inventory. Walk through every room with your phone, narrate what you see, photograph major appliances and electronics. Store the video in a cloud account, not only on your phone. A current inventory is what makes a personal property claim move and makes underpayment harder to sustain.
If you have been non-renewed or you’re shopping in a high-fire-risk market, contact your state Department of Insurance about options and consumer protections. Most wildfire-prone states have a FAIR plan (a state-organized insurer of last resort) as a backstop. FAIR plan coverage is typically narrower and more expensive than a standard policy; treat it as a bridge. Coverage, pricing, and eligibility vary by state and insurer. None of this is professional insurance advice: confirm your specifics with your own insurer and a licensed agent in your state. The wildfire home insurance guide covers the availability problem in depth.
In California, admitted insurers are required to offer mitigation discounts under the state’s “Safer from Wildfires” framework. An IBHS “Wildfire Prepared Home” designation can document your work for a carrier. Discount availability and eligibility vary by state and insurer; ask your company directly whether a mitigation discount exists and what documentation qualifies.
Putting it on a schedule
Preparedness isn’t a one-time project. It needs to repeat, roughly annually:
Spring (April to May): Clean gutters after pollen and seed drop. Walk Zone 0, pull any debris from winter. Inspect vent screens; replace any with gaps or rust. Review your insurance policy at renewal and check your dwelling limit against current rebuild costs.
Early summer (May to June): Complete Zone 1 thinning and brush clearing. Mow Zone 1 ground cover. Confirm go-bag medications and documents are current. Update your home inventory if you’ve made major purchases.
Late summer (August): Spot-check Zone 0 for dry debris accumulation. Confirm gutters are clear. Move combustibles away from the structure if fire conditions are elevated locally.
Fall (October to November): Clean gutters after leaf drop. Pull updated home inventory photos. Check smoke and CO detectors.
Firewise USA (an NFPA program) offers household and community certification that formalizes a process similar to this. If your neighborhood is enrolled or eligible, it adds community-level fuel reduction and evacuation coordination that individual home hardening alone can’t achieve.
FAQ
How often should I clean my gutters in a fire zone? At minimum twice a year: late spring after trees drop pollen and seeds, and fall after leaf drop. If you have conifers close to the house that shed needles year-round, add a third cleaning in late summer. The goal is empty gutters going into peak fire season, which in most of the western US runs July through October. A fine stainless-steel micro-mesh gutter guard removes the task entirely if you want to stop managing it seasonally.
Will completing a wildfire mitigation checklist lower my insurance premium? It might, depending on your state and insurer. California’s “Safer from Wildfires” framework requires admitted insurers to offer mitigation discounts, and IBHS “Wildfire Prepared Home” designation can support that conversation. Outside California, formal discount structures vary widely by insurer and state, and many policies don’t have one yet. The more reliable framing is that documented mitigation improves your odds of keeping coverage in a market where carriers are non-renewing high-risk homes. Ask your insurer directly, and check your state Department of Insurance website. This is educational guidance; confirm what applies to your specific policy and situation.
What is the single highest-impact item on a wildfire preparedness checklist? Zone 0: clearing and keeping clean the first 5 feet around your home. IBHS research and Cal Fire field data consistently point to the zone immediately adjacent to the structure as where many home losses begin. Embers land there, find dry mulch or pine-needle buildup, and ignite. It costs time but not money, and it directly addresses the mechanism behind most home losses in a wildfire. Clean gutters are a close second for homes under significant tree cover.
What should I do if I am in or near an active fire area right now? Follow your local emergency management agency’s guidance first. If you’ve been ordered to evacuate, go. Contact your insurer as soon as it is safe to do so to open a claim; most policies have a reporting window and you don’t need final damage information to start. Document what you can: photos taken before you left, and exterior photos from the street after an all-clear if entry is permitted. Contact your state Department of Insurance if you encounter claim problems; they have consumer advocates specifically for disaster events. Ready.gov has post-disaster recovery checklists as well.
Related guides
After the Wildfire: Filing Your Insurance Claim
A step-by-step guide to filing a wildfire insurance claim: what to document, how the adjuster process works, and when to push back on a low estimate.
Read the guide →Best Air Purifiers for Wildfire Smoke
How to choose an air purifier for wildfire smoke: why you need true HEPA plus activated carbon, how to size it right, and what else to do when AQI spikes.
Read the guide →Wildfire Evacuation Levels Explained (Ready, Set, Go)
Know what Ready, Set, and Go actually demand of you before the next wildfire alert hits your phone, because Level 3 is too late to start planning.
Read the guide →Keep ignitable debris out of your roofline
Get a free, no-obligation LeafFilter gutter-protection assessment. Fine micro-mesh keeps leaves and pine needles out of the gutters, the spot where wind-blown embers love to land. Booking through us supports this site.
Get a free LeafFilter assessment →